Reverse seared? A bit of a twist on the standard way to cook a joint of meat that will give you amazingly moist meat with a perfect sear.
There’s been a lot of talk on the web about reverse searing meat so I thought I would give it a go.
So what exactly is a reverse sear? As opposed to the standard way of cooking a piece of meat where you drop a joint into a pan and seal it, giving it colour while also ‘trapping in the moisture’, reverse searing turns this process on its head. The key here to me, is that the standard way of searing a joint at the beginning doesn’t really trap in any moisture in my opinion. It could be argued it dries out the outer layers of the joint before you’ve even started to cook it. A reverse sear on the other hand involves cooking the joint very gently, bringing the core temperature of the meat to close to the required temperature and then searing the outside at the end of the cook on a very hot grill. Using this method the outside of your meat is already a good way to the temperature you’ll be exposing it to on the grill so achieving the caramelisation on the outside is quicker, leaving the inside exactly how you wanted it to be, rare in my case.
There is a great article on the Amazing Ribs website that goes into far more detail.
Ingredients
- Joint of beef - rib eye or rib of beef
- Sea salt
- Crushed black pepper
- Mild chilli powder
Equipment
- Big Green Egg with plate setter for indirect cooking
- Cast iron grid for searing
- Roasting pan
- Digital thermometer
Method
- Allow your joint to come to room temperature (this may take a few hours)
- Prepare a light rub of 1 teaspoon salt, 1 teaspoon black pepper and 1/2 teaspoon of mild chilli then sprinkle this on your joint and rub in. Leave for 20 minutes before you start cooking.
- Prepare your BBQ for indirect cooking and raise to a temperature of 110C, we’re going to cook the joint very slowly for the first part.
- Put your joint onto the grid of your BBQ in the roasting tin.
- Cook until the middle of your joint is 7 degrees Celsius below the desired temperature, for example a rare piece of beef should be cooked to 52C so we’ll cook it here to 45C. The resting process will allow the hotter outside of the joint to continue to cook the middle.
- Once at temperature take the meat off the BBQ, convert to direct heat (remove the plate setter in the case of a Big Green Egg and add the cast iron grid). Open up the air vents and allow your BBQ to get to 375C or higher.
- Carefully sear the meat on all sides, moving it all the time to make sure the cook is even.
- Take off the BBQ, cover with foil and leave to rest for 20 to 30 minutes depending on the size of your joint. I place mine in a camping cool box, allowing the meat to stay as hot as possible.
- Use the juices left in the roasting tin to make a beautiful gravy and dig out the horseradish sauce.
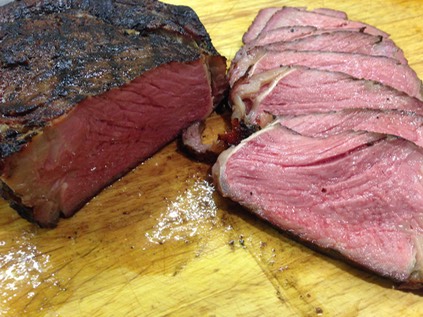
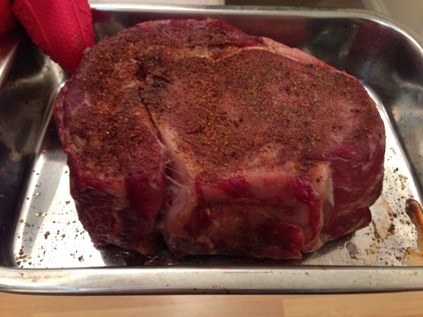
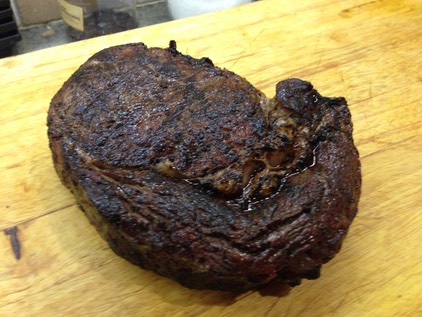
The photos above show the finished product at the top, the joint following the roasting process where it reached 45C (middle) and the seared joint (bottom).
This was one of the tastiest joints I’ve ever eaten. The reverse sear process allows you to perfect the cooking so you end up with a joint cooked to your liking. Try it, you’ll be amazed.